
Original Post:
Khana Pieces
[Monday, December 28, 2009]
Here is the update on how building my yurt is going:
In the past few weeks, I bought the wood pieces to start making the khana, which is the slat walls of the yurt. I went to Ashby Lumber in Berkeley, and bought 80 pieces of 8ft slats (they are 1x2 inch) made of douglas fir. I am following Paul King's guide, although I am not bending the khana pieces as he suggests in his book. I just don't have the time or the energy to make a steaming vessel to put all of the wood pieces inside and then bend them.
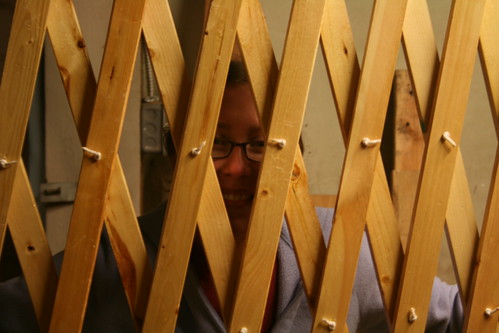
The khana join together at points 9 inches apart to form a criss-crossed lattice style wall. For my 12 foot diameter yurt, I will need to make 3 sections of khana, which join together to create the wall. The wall wraps around and is forced into a circle. Once it is joined to a door frame (as you can see in the photo below) it creates a strong support for the roof poles.

This is a picture of a yurt from allaboutyurts.com where you can see the lattice wall, or khana.
I have a total of 85 pieces, the longest being 6.5 feet. This should make for a 5 foot wall height. It took me two weekends to cut down each of the 85 pieces to length, and also round off the two ends so that there weren't any sharp corners. Then I had to drill holes every 9 inches. There were soooo many holes to drill that it literally took half the entire time. I first made a template piece, which had three holes drilled every 9 inches. I put that on top of the piece of khana I was drilling to mark where to make each hole. When I marked the three from the template, I moved the template down the piece until I reached the end, as Paul King suggests in his book.
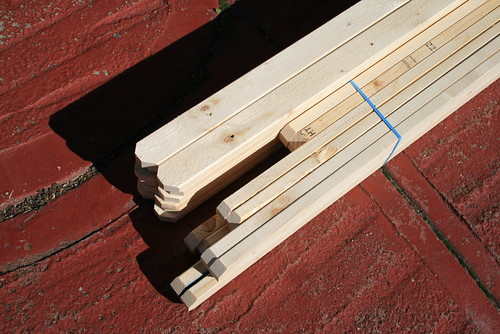
Some of the khana pieces I made our of douglas fir. The ends were cut at an angle so that there were no sharp points.
I am now in the process of sanding all of the pieces (all 85 of them!) and then varnishing them with one coat. I got over half of them sanded already and about 1/5th of the pieces varnished. The varnish will seal the wood and make it look nicer from inside. I am basically done with the frame of the yurt. Now I just have to put it together after I finish varnishing all of the pieces, including the roof poles.
----------------------------------------------------------------------------------------------------
Original Post:
Done Varnishing the Khana
[Saturday, January 2, 2010]
After inhaling a bunch of fumes, I finally finished varnishing all 85 pieces of khana which will make up the three sections of the lattice yurt wall. Since I had so many pieces and not much space in the garage for them to dry, I built a small functional drying rack. The weather here has been playing games with me. The weather report said it was going to rain for the whole past week, so I felt hesitant to start varnishing with all of the possible humidity. But then I said, what the heck!? I will just varnish in the garage and if it takes longer for the khana to dry, so be it, at least I will get it started.
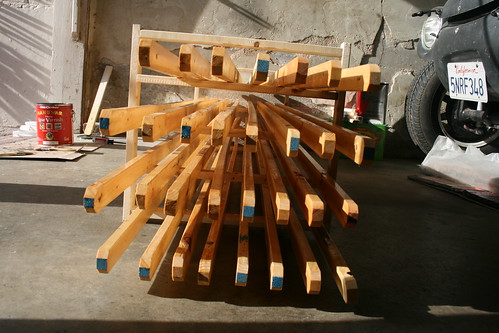
About 2/5ths of all of the khana pieces drying on the rack I built.
It turned out to be nice, sunny, and warm during most of the days this week. It only rained at night. I varnished with spar varnish, normally used for marine or boat applications. I applied one thick coat. I didn't want to put more on it, since the khana will be slightly bent when the yurt is standing. I figured if I layered it on any thicker, the varnish might crack under the stress.
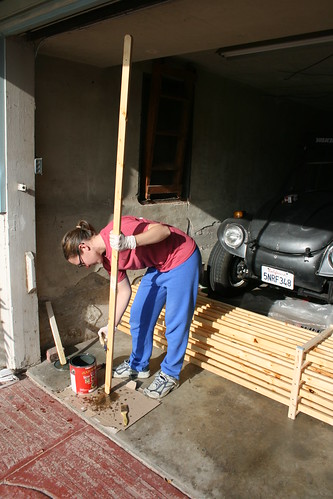
Me varnishing in the garage. It looks like the baja is looking at my butt and smiling!
The next step now, after the last batch of khana pieces are dry, is to join them all together into the lattice sections. I think I will do this two days from now. I also forgot about making a door frame! I will do that tomorrow, I think, while the last batch of khana dry.
----------------------------------------------------------------------------------------------------
Original Post:
Putting Together the 1st Khana Section
[Sunday, January 3, 2010]
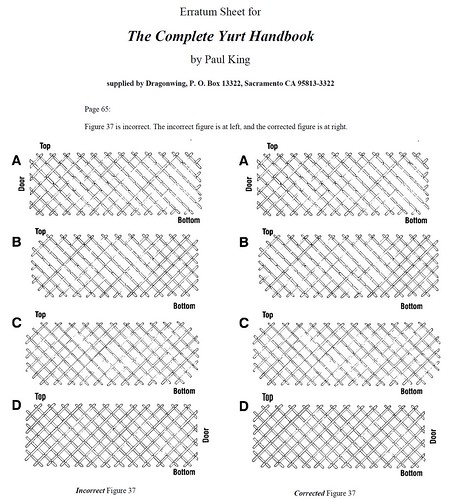
This morning I was sooooooo excited to see that the varnish dried on the khana pieces earlier than I expected. So that meant that I could start tying together the khana pieces into the three khana sections which make up the wall of the yurt. I used Paul King's book as a guide. My friend, John (who has his own tent and sunshade making business) let me know about an error in Paul King's diagram for the khana. It was a good thing he let me know about it, because I was kinda confused when I saw the wrong version in Paul's published book. I used the corrected version.
Basically, the error in Paul King's book is that he shows only 14 full-length pieces, when there should really be 16. Here is John's erratum sheet that he sent to the publisher (click on it to see a larger version):
The long khana pieces go together criss crossed. I used 1x2 inch douglas fir for the khana pieces. They are joined with a nylon braided polyester cord 1/8" thick string. There are 8 full length pieces in each direction for each khana section, and for my yurt, I need to make three sections. In addition, there are also progressively shorter and shorter pieces that need to be included to make the ends square. The following pictures are a step-by-step guide to how to put a khana section together. As I mentioned in my previous posts, the holes where the string goes through to connect khana pieces together have already been drilled prior to today, and I also cut each piece to size, sanded them, and varnished them.
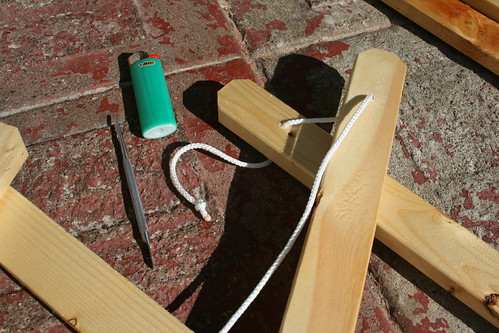
Step 1: Push the string from the top to the bottom and out. Sometimes it helps to fashion a 'needle' out of a stick or something similar. Knot the end and burn it with a lighter so that the end of the string doesn't unravel. I used synthetic string, but if you are using natural fiber, you shouldn't burn it.
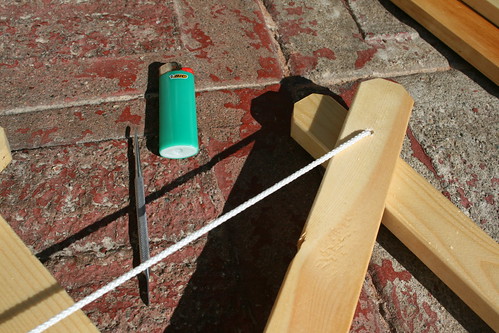
Step 2: Pull the string hard and tight so that the knot on the other end seats. Make sure the two khana pieces are aligned how you want them to be.
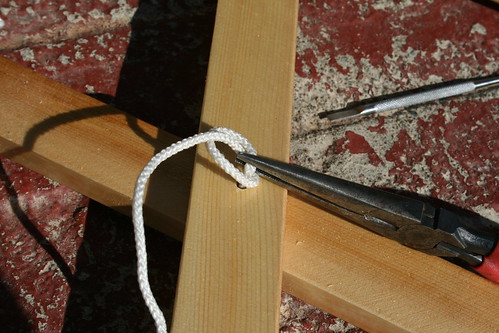
Step 3: Keeping the string tight, use pliers to help tie the knot at the top. Try to make the knot as close to the wood as possible.
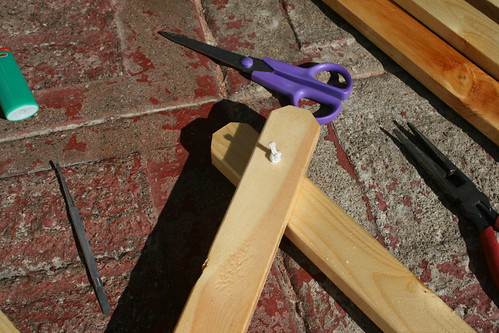
Step 4: After tying the knot, cut off the excess string. Finish it by burning the end so that the string doesn't unravel.
I had this vision this morning that I would finish all three khana sections today. In one khana section, there were a total of 76 'joints' and 152 knots to tie and burn! Needless to say, it took me all day to complete just one khana section, even when Romy helped me for an hour or so! That means I still have two more days to go making the sections, and one more day to make the door frame.
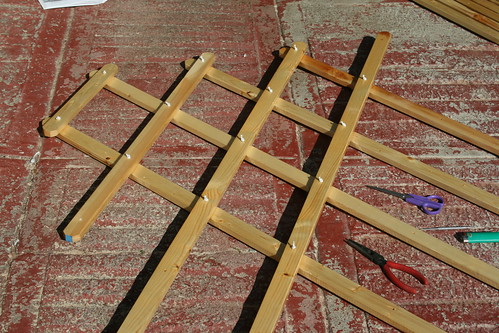
The start of putting a khana section together. This is a view of the corner.
My dad thought that the khana might not bend enough to create a circle without the pieces breaking, so I tested it out. It bends really well, and the actual pieces don't bend as much length-wise because they are at an angle. I was happy when I saw that! Anyways. . . here are some more pictures I took over the course of the day (and night).
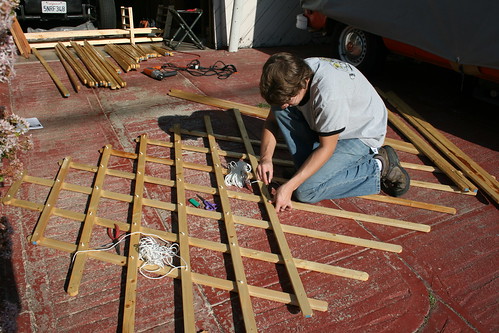
Romy helping to make the khana sections.
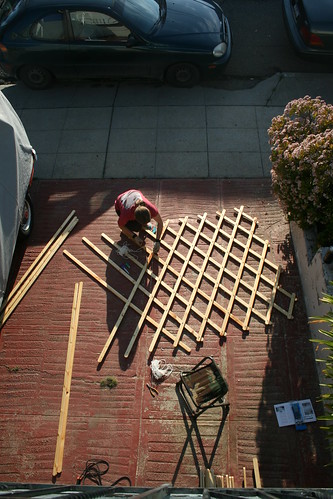
Me making the khana sections. It is getting towards evening. Romy took this picture from the balcony above the garages.
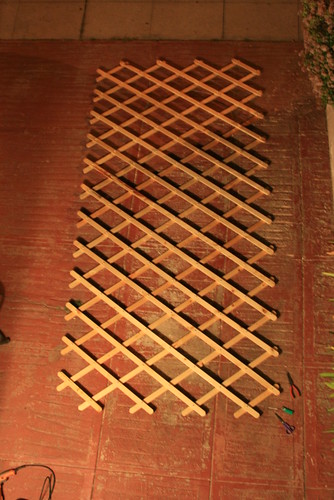
The completed khana section. Its dark outside so the picture blurred a little.

Me holding up the khana section when it is all folded up. Its not as big as I thought!
I look all tired! But the first section is all done. Yay!
----------------------------------------------------------------------------------------------------
Original Post:
2nd & 3rd Khana Sections Finished
[Tuesday, January 5, 2010]
It took a day each to finish, and now all of the three khana sections have been completed. I would suggest wearing gloves when you work with the rope. For the first hour, I didn't have gloves on, and I started to get blisters on my hands from constantly pulling the rope tight. Then I found some leather gloves, and they made everything less painful, but I felt a little more clumsy due to the loss of feeling in my hands.
As I was starting the third khana section, the gas in my Bic lighter ran out. I had another lighter (generic from Ace Hardware) which I used to melt the ends of the strings, but the flame sucked. It was small, not as hot, and generally weak (even though it still had a lot of gas in it). I didn't think that there would be such a difference between cheap-o lighters, but apparently there is. It was perfect timing that Romy was coming back from school just as I was getting sick of the generic lighter, so I called him and asked him to pic me up a Bic on his way home. When he brought it home, I was soooooo happy because the Bic was 100 times better!
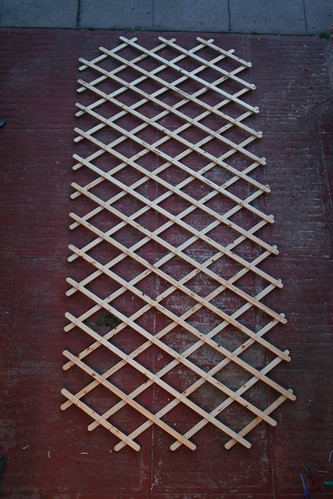
The first khana section completed.
The second khana section completed.
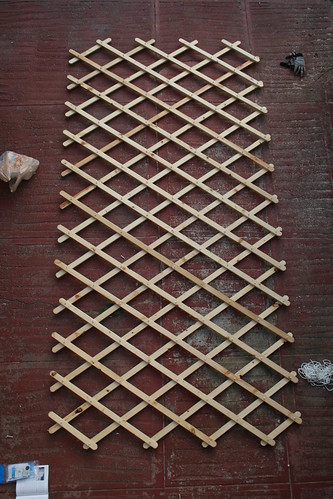
The third khana section completed.
The two khana sections that attach to the door are mirror images of each other and use the same piece dimensions. When I was cutting all of the pieces, I just doubled the amount I made. However, the middle section (the second khana section) is slightly different. It has no 'corners' because part of it will overlap the other two sections when you join them together. I will post a detailed picture of this soon, when I raise the frame for the first time.
I think the pictures I provided here are detailed enough to go off of if you wanted to make your own. The dimensions are all in Paul King's book, however I think the photos I took are better than his hand drawing (its tiny in his book, and has an error). But I must warn you, there is one mistake in my third khana section! Can you spot it!?