
Original Post:
Yurt Roof Poles
[Saturday, October 31, 2009]
Here's an update on how the yurt is going. Last night we were supposed to leave in the bus to go visit the natural hot springs on the east side of the Sierra Nevada mountains, along hwy 395, for the weekend. But the bus wasn't running right, and we were in the middle of changing out all of the window seals in the baja so we couldn't take the baja either :-(
So we decided to just stay at home this weekend and work on the VWs and I would work on getting the yurt roof poles done. This morning, I set up the table saw and began choosing 36 2x2's that weren't cracked at the knots. I used John LaTorre's method of making poles which he outlines in his book, The Pavilion Book, a complete guide to buying, maintaining, and living in a Medieval-style tent. I met John at the vwcamperfamily camp-outs that we go to in the VWs. His book is awesome! I recommend buying it if you plan on making a tent or yurt, or even a tipi, because he gives a lot of good insider's tips.
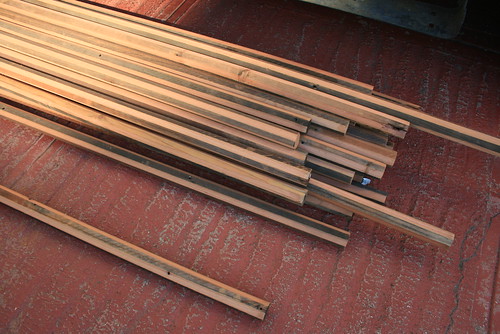
36 yurt poles which I cut on the table saw
To make the poles, I cut the corners off to make a octagonal pole. Each pole went through the table saw four times, once for each corner to be cut off. I made 42 poles total, but ended up rejecting 6 of them because they had knots or splits that made the pole weak and bendy. In the picture, the poles look striped, but this is because the redwood was exposed to the sun for a while which made them brown. When I cut the corners off to round the poles, the red, "fresh" inside was exposed. I think it looks cool like that, but I'm not sure if the brown parts would do well being coated with some spar varnish.
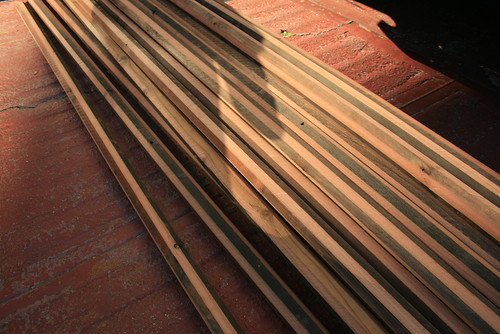
Another picture of the poles
The next thing I need to do is cut the poles to size. Since I am making a 12ft diameter yurt, the roof poles need to be 6ft long. The roof angle will be 30 degrees, thus making the crown 2.5ft in diameter. I will also need to taper the roof poles to make them easier to stick into the crown.
----------------------------------------------------------------------------------------------------
Original Post:
Yurt Crown Almost Finished
[Sunday, November 1, 2009]
So next I moved on to finish the roof poles. Since they were still rough (all I did last time was round them out), I had to cut each of them to 6 ft. This wasn't too hard, but it was time consuming. Some ends were split, so those were the ends I cut off. Other ends had knots in them, so I also chose to cut those off too.

All 36 roof poles are now 6 ft long.
To attach the roof poles to the crown, I decided to go with a 3 inch long dowel pin that is 1/2 inch thick. I cut those to size from a long dowel rod I bought at OSH (a hardware store). That was much cheaper than ordering real fluted dowel pins from a supplier. I only needed about 40 dowel pins, but usually large dowel pins like that are sold in bags of 100! Anyways, 2 inches of the dowel pin goes inside the end of the poles, and 1 inch will stick into the crown. The dowel pins are now part of the roof poles. But to make drilling easier for myself, I first drilled a 2.5 inch deep hole into one end of each pole (1/2 inch thick) and then cut the same end off each pole at an angle, to accommodate the slope of the roof. In the process, about 1/2 and inch was sheared off, which is why I had to drill the hole 2.5 inches deep at first instead of 2 inches. It is much easier to drill into a perpendicular surface than into one that is angled at 30 degrees!
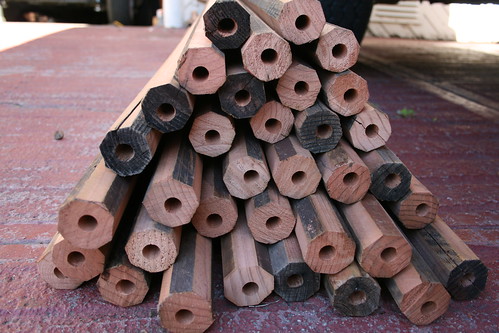
The holes for the dowel pins are drilled into each end of the yurt roof poles.
As an added complication, since the yurt crown is a polygon instead of a true circle, some of the poles come at an angle to the crown (I'm not talking about the angle of the roof slope). There is only one roof pole per polygon side that comes in straight on, and that's the one right in the middle of each polygon section. The other two come in at opposing 10 degree angles. So I had to cut each pole either straight on with a 30 degree slant, or +10 degrees with a 30 degree slope, or -10 degrees with a 30 degree slope. Consequently, I labeled the end of each pole so that it will be easier to build it.
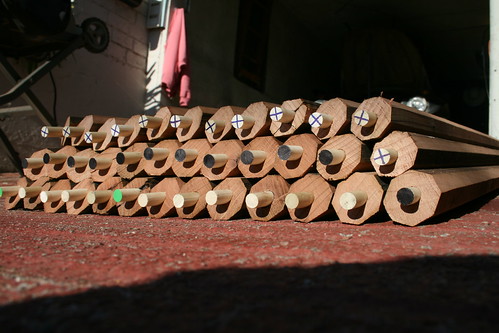
Each roof pole is labeled and cut with its corresponding angle.
I also cut a notch into the other end of the poles for the wall attachment, but I will save explaining that for another post.