I used a 13oz water, mildew, and fire resistant canvas, which was dyed turquoise for the walls. The roof canvas was also a natural 13oz canvas, but was only treated for water and mildew resistance. The fire resistant coating makes a huge difference in the way the fabric looks and feels (and smells). The turquoise fire resistant canvas is stiffer and kind of shiny. The natural canvas is more flexible and easier to handle in the machine.
I also bought a 20 gauge clear plastic "fabric" for the yurt windows. It was really clear, and cost about $10/yd. There is no need to go any heavier, unless you are making large windows. I limited the width of each window to about 2.5ft so that the windows didn't take too much of the weight of the walls. We made 5 windows total, two of them were long (spanned almost the whole height of the wall), and two of them were medium length.

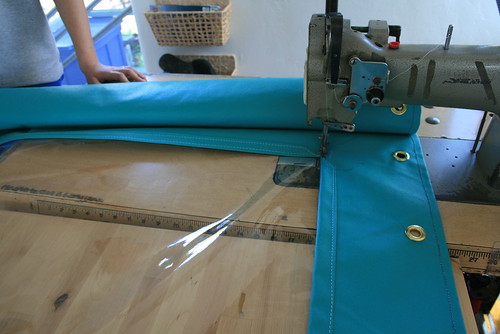
Cutting out the fabric behind the window.
To sew the windows on the walls, we first sewed the plastic onto the side of the fabric which will be the inside of the wall. Once it was sewn in place, we cut the back of the fabric away, exposing the window. In the picture above, you can't see the plastic window, but its there, believe me! We left about 2.5 inches of scrap so that it was easy to fold it back to make a nice border around the window. The corners were left exposed (they had no border), but we decided that it can be covered by a small triangle shaped trim I'll sew over it later.

Sewing the flaps into a nice border around the windows.
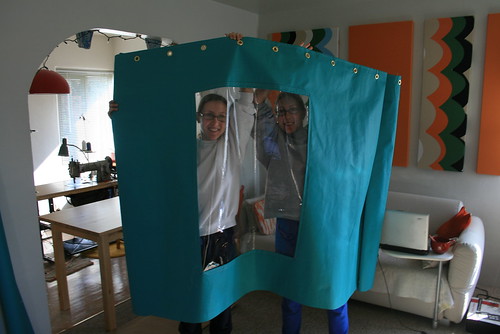
We also placed brass spur grommets at the top of the wall every 7.25 inches. Why 7.25in? I don't know, I just made that number up. I thought that spacing would be good to support the wall. The total amount of grommets was about 60, I think, supporting a wall 36ft long. I used 1/2inch spur grommets (#4), which required a special tool. The tools, called a die set, and hole puncher, are specific to the grommet size, so you will have to buy the same size tools and hole puncher as you do grommets. I ordered my tools and grommets from Sailrite.

Me and Nicole (my twin sister) with a finished window. You can also see the grommets.
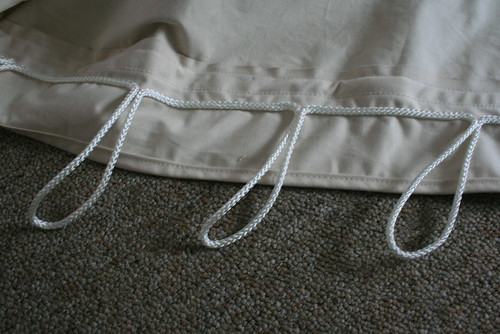
Once the windows and grommets were done on the wall, that was about all that needed to be done (for now). So next we moved on to finishing the roof. We first sewed together the final seam which completed the cone shape of the roof. Then we cut off the scraps which hung over the sides to make the roof circular. Then we sewed a roof band along the circumference of the roof to make a tight roof line. On the inside of this roof band, we sewed a series of rope loops which were spaced at 7.25 inches, the same as the grommets. The loops of rope fit through the grommets at the top of the wall to join them together.

The rope loops sewn on the underside of the roof, along the circumference.
Just getting to this point took us almost two days. The wall was still not completely done, because we still had to sew on the bottom band, a strip of vinyl or plastic material (not canvas) which will be in contact with the ground and be tucked underneath the khana (the wooden part of the wall). This band is there because you don't want the canvas to be in contact with the ground because it will absorb water and possibly start to rot. Plus we didn't make a door flap yet. But at this point we were really excited to get the yurt built to see if what we sewed so far was okay or not.

Be your own curator of canvas art prints in your home when you decide on whether you would like to decorate with canvas paintings or photography, modern or romanticism, big or small, wall26.com has it all! canvas art paintings
ReplyDelete